You’re a sales representative for a thriving company, and you’ve just onboarded more than 100 new clients for your product. Now, each of these clients requires a contract or agreement. Sending these documents manually might be a time-consuming and labor-intensive task.
But here’s where a real-life solution fixes this problem. By connecting BoldSign with Pipedrive through Zapier, you can automate contract management to accelerate the sales processes. This integration can be a game-changer for businesses dealing with a high volume of contract management.
In this blog, I will guide you through the process of connecting BoldSign with Pipedrive through Zapier.
Requirements
To integrate BoldSign with Pipedrive through Zapier, you will need the following:
- A Zapier account
- A BoldSign account
- A Pipedrive account
If you don’t already have a BoldSign account, you can sign up for a free trial now.
Creating Zaps
Follow these steps to create a Zap that connects the BoldSign and Pipedrive apps using Zapier:
- Go to the How to connect BoldSign + Pipedrive page and click Connect My Apps.

You will be redirected to the integration page.

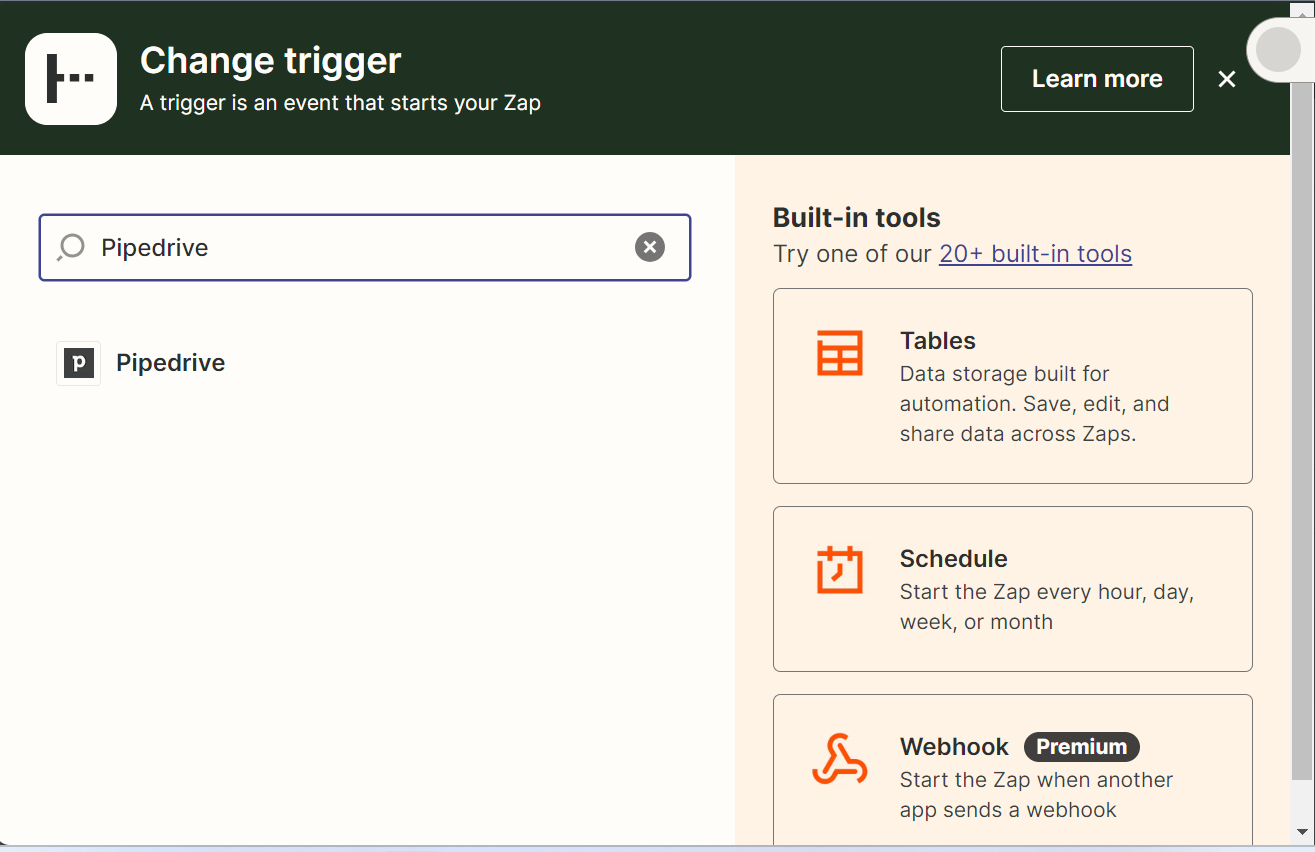
- Click Trigger, search for Pipedrive, and select Pipedrive as the trigger application.
- In the App & Event section, choose the trigger event that you want to use to send the contract when this event is triggered.

- In the Account section, select your Pipedrive account and test the trigger in the Test section. Once the trigger is successfully tested, the recently added event will be displayed.

- Next, click Action and search for BoldSign, selecting BoldSign as the action application.

- In the App & Event section, choose the trigger event Send Document From Template. In the Account section, select your BoldSign account. In the Action section, choose a template from your account. If you are testing, set Sandbox Mode to True or False.

- Choose the recipient’s name by selecting a placeholder from the drop-down menu, such as “Person Name” or “Person ID Name”. Similarly, choose recipient email from the “Person ID Name.” Zapier will later fill in the actual information from Pipedrive for every deal.

- Add additional information, such as the document title, message, or expiration date, as needed.

Once the trigger is successfully tested, the document will be sent to the recipient’s email address, which will be your client.
The following screenshot shows the overview page of the created signature request document in the BoldSign web application.

- Publish the Zap and turn it on. You can view the created Zap on the Zaps page in Zapier.

Conclusion
By connecting BoldSign with Pipedrive through Zapier, you can automate contract management and other sales processes. With this integration, the once manual and time-consuming task of sending agreements and contracts is streamlined. Say goodbye to the possibility of human errors and hello to a more efficient and reliable workflow. To experience the benefits firsthand, start your 30-day free trial of BoldSign and unlock the power of eSignature automation through BoldSign’s integration with Zapier.
We genuinely value your feedback and invite you to share your thoughts below. If you require any assistance or wish to explore our services further, don’t hesitate to schedule a demo or reach out to our dedicated support team via our support portal.